Coconut & Bean

Where family and style coexist

  • about
    • faq
    • contact
  • wear
    • what to wear
    • outfit recipes
  • travel
  • motherhood
  • made
  • videos

How to make baby shower favors

February 18, 2016 |

Table overall 600

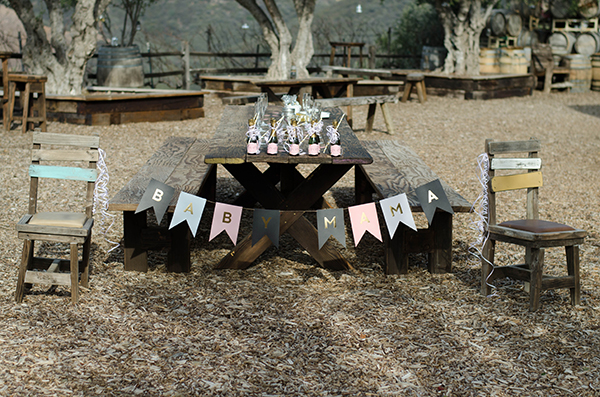
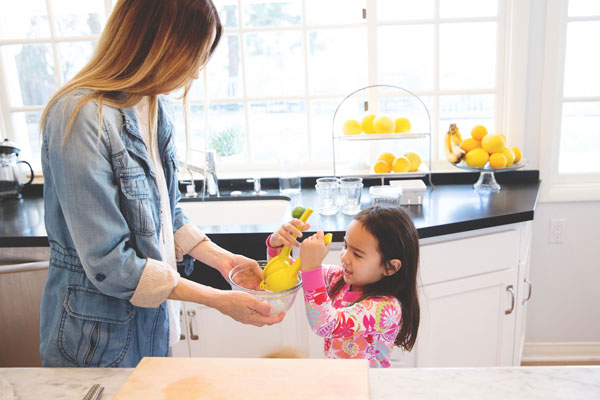
In the last ten years that I’ve been pregnant, having kids, making friends with kids, having friends with kids, I’ve been on a quiet mission to modernize the baby shower. I’ve given a few of them now and though I will indulge in the occasional pink or blue color schemes, I have successfully steered away from games involving chocolate poopy diapers, name guessing, toilet paper measuring and I certainly will never understand why many of these events are dry. Some with not even a bellini in sight. The shower and sprinkles I’ve given over the years have been backyard fiestas with couples, poolside girls’ days and most recently, a winery picnic. Of course so much of the perfect (modern) shower depends on location, location, location and this one we found at Cielo Winery in Malibu may be the best I’ve seen. (Cue the horn tooting). Nestled in the canyons of Malibu, “the barn” where we lunched is classic, beautiful and fun-just like the mama we were celebrating. With a setting of vineyards, rustic wine barrels and a view that looks like something out of “Under The Tuscan Sun” there wasn’t need for a lot of hoopla, but I couldn’t help but spruce it up a little with some paper goods and the perfect favor to set the tone. These custom champagne sippers were easy and fun to do and could be used for any occasion. Showers, weddings, or just a rough week in need of some cheer. I hope you enjoy them as much as we all did, and if you don’t-drop the leftovers at my house;)

 Bottle, strip, tape 600 copy

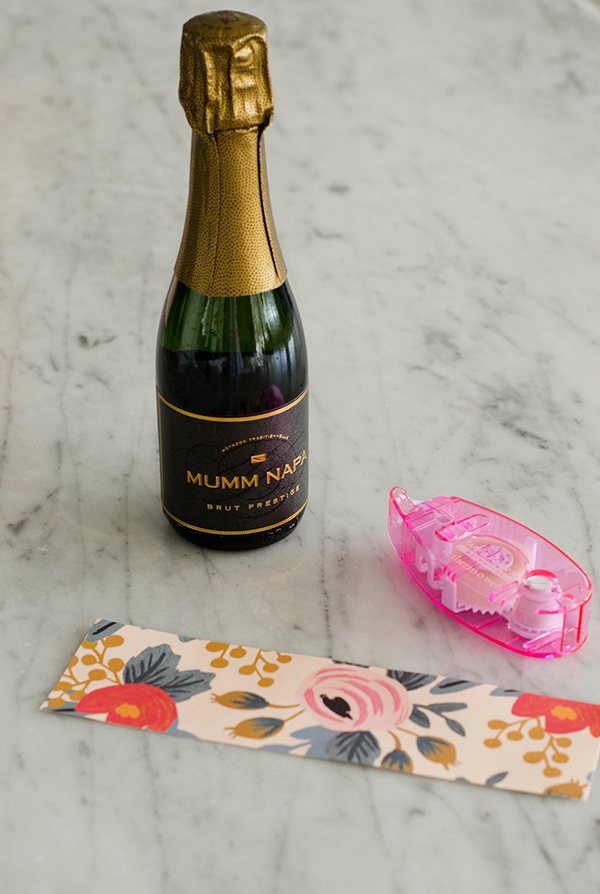
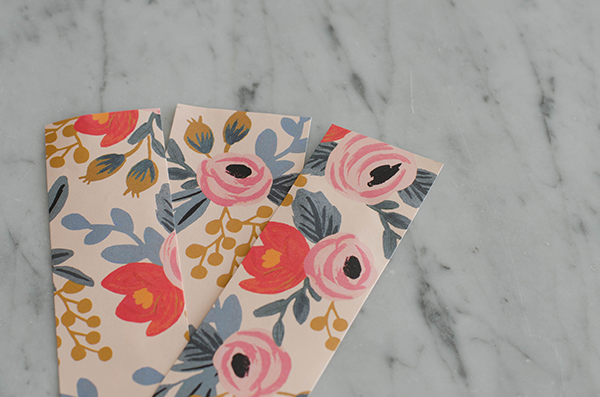
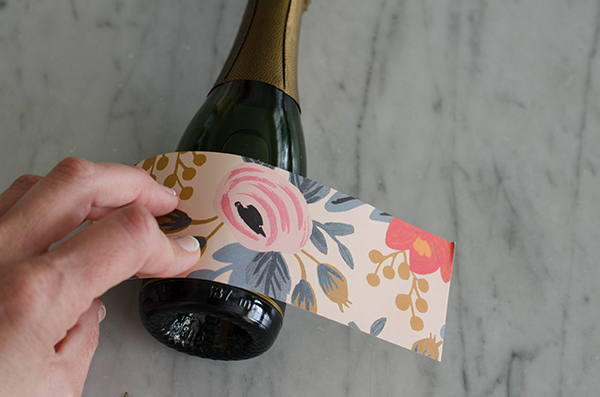
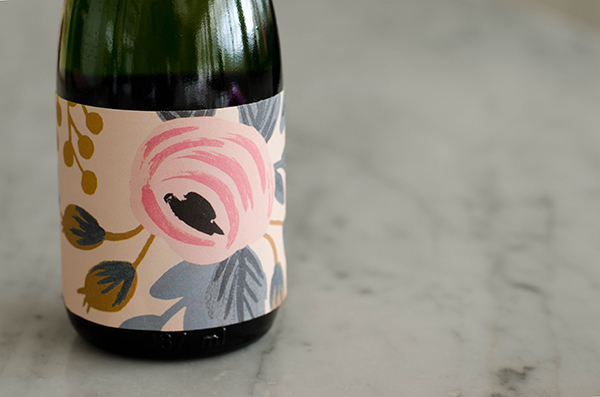
Measure the existing label on the bottle with a measuring tape and cut out strips of wrapping paper to match the size. These mini champagne bottles are from BevMo. The paper and double adhesive dispenser are from Paper Source and I am not ashamed of my complete obsession for both. I want to wallpaper my daughters’ rooms in this pattern and I am shocked how much I have ended up using the dispenser after this project. Great for kids crafts or cut-and-paste homework assignments.

Label strips

Double stick 600

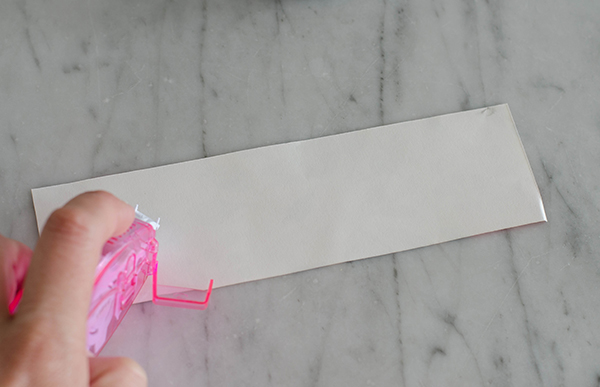
Apply double adhesive to the middle and edges of the paper strip. Then wrap around the bottle to cover the original label completely. Secure in back by overlaying the paper.

Applying label 600

Label applique 600

Label close

Label up close 600

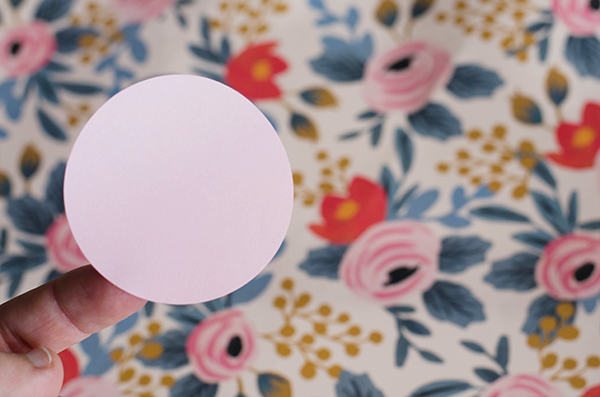
These labels are from Paper Source and after a small trial and error session with Illustrator I was able to personalize them and print them at home.

Bottle close 600
Bottles table 600

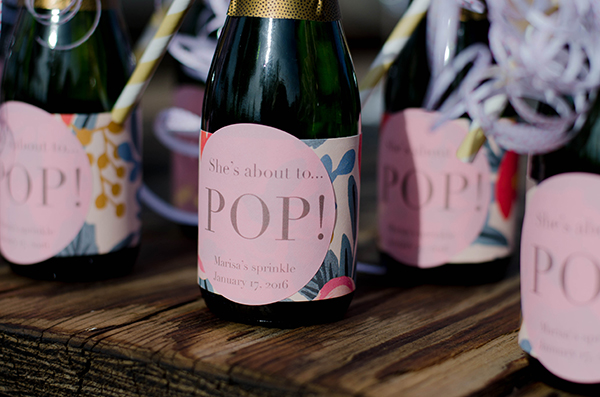
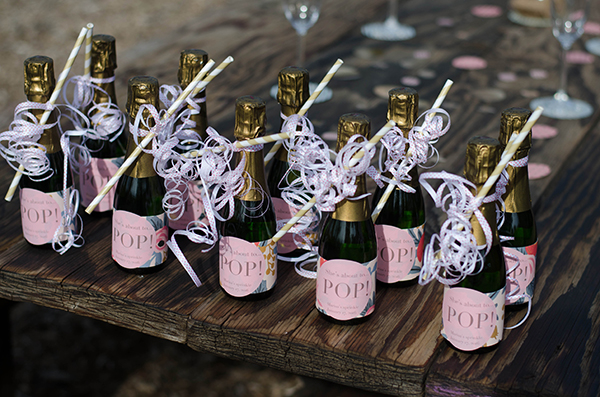
Coordinating paper straws and curly ribbon make perfect finishing touch to these show stoppers.
M napkins 600

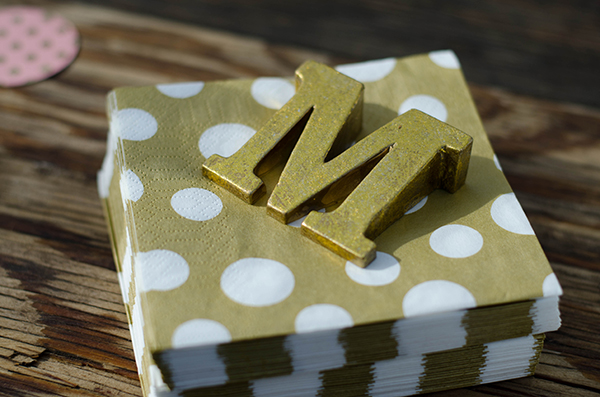
Initial paperweight from Michaels. Love truly is in the details.

Table confetti 600

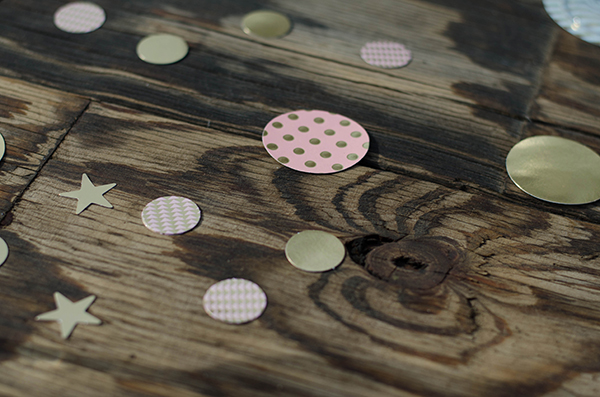
Table confetti and banner from Paper Source.

Word of Wisdom 600

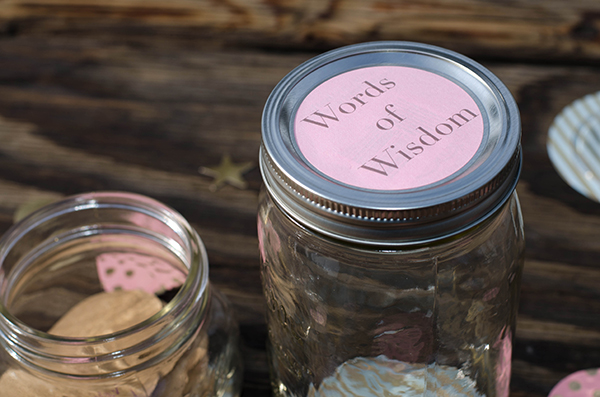
A mason jar and notecards for girls to leave unsolicited advice provide an acceptable activity for the modern shower. Obviously the seasoned moms in attendance suggested keeping wine on hand at all times.

Marias-and-I-600

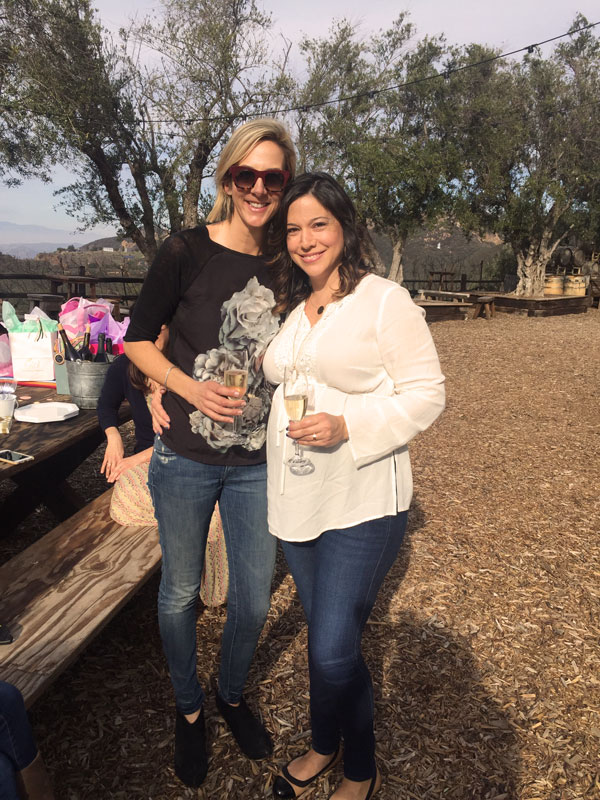
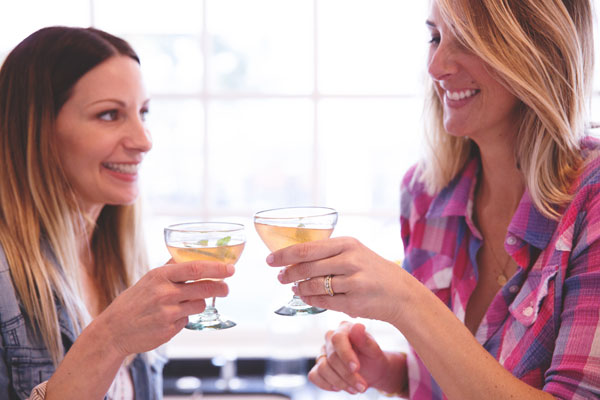
Beautiful baby mama Marisa and I toasting her next chapter.
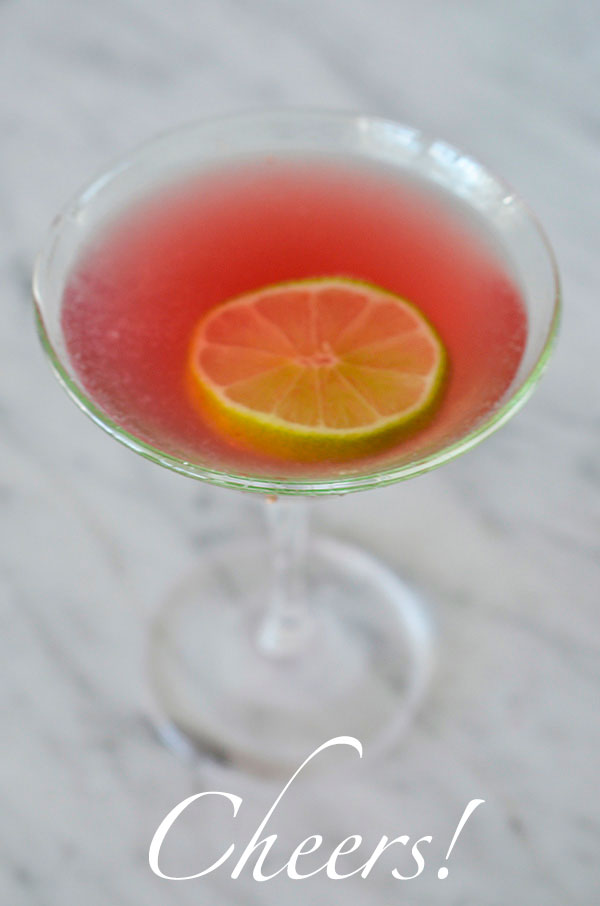
Me-with-champagne-600

Champers!!!

Sunset 600

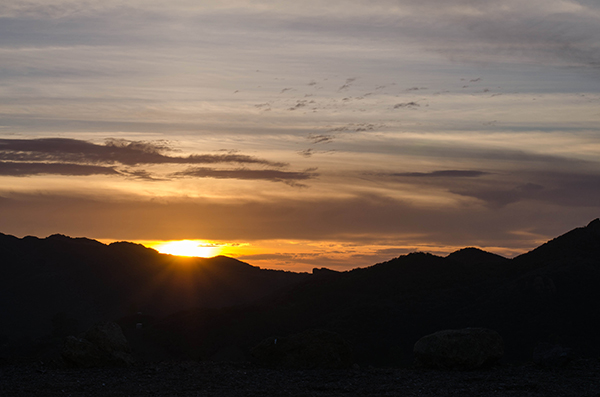
Perfect end to a perfect day.


Filed Under: Made

Easter cocktail recipe

April 2, 2015 |

Strawberry-1

One of the best parts of motherhood for me has been the incredible friendships I’ve made while riding this crazy train. Liesl Maggiore of Lieslicious and Ashley Forchelli of Ashley Forchelli Photography are two of those MFF (mom-friends-forever) who have gotten me through those rough times like “I suck at this job, why did I even have kids!?!” to the good times like “Oh my gosh, did you see that!?! I’m mother of the year!” with humor and just the right amount of hand holding. I met Ashley in my first Mommy&Me class and when I caught her quietly loathing the sit-in-a-circle-singing-songs thing as much as I did I knew it was on. She later introduced me to Liesl who I instantly fell madly in love with. Over the years we’ve cried on each other’s shoulders, laughed til we peed and drank til we puked. (I said it!) Yeah, we like the cocktails. So when we threw the idea around of doing a project together, it’s no surprise we landed on making a cocktail. With Easter right around the corner and strawberries so berrylicious now we thought we’d put our own twist on the Easter brunch mimosa. So of course we added vodka-duh! I love so much about this recipe. First of all, the smell of my kitchen after making the strawberry simple syrup was pure heaven and the perfect way to greet guests. Second, the presentation of the limes, strawberries and bubbles is just so pretty and so Spring! Finally, I love that you can make it ahead of time and put it out for guests to serve themselves with one step instead of the constant measuring and bubbling over of Mimosa. Ashley’s photos of our collaboration were so pretty I had a really hard time editing them. At one point I was like, yeah thirty photos seems right! She did such a great job capturing the beauty of this drink, but more importantly in the fun we had making it. Here is a step-by-step below and for the complete recipe and so much more deliciousness visit Lieslicious today.

Happy Spring-xo

Strawberry-2

Cut two cups of strawberries into quarters.

Strawberry-3

Strawberry-5

Add 3/4 cup of sugar and four whole mint sprigs to strawberries.

Strawberry-4

Strawberry-6

Pour strawberry/mint/sugar goodness into a saucepan and add 3/4 cup of water. Bring to a boil, then let simmer for five minutes. Mash the mixture with a potato masher then let simmer for another five minutes.

Strawberry-10

Once cooled, strain liquid into a bowl. Press the berries against the strainer with a spatula to get the most juice out of the strawberries.

Strawberry-7

Get a really cute kid who’d rather stay home and cook with mom and friends than go to preschool to help you juice 1/3 cup fresh lime juice.

Strawberry-13

Combine the fresh lime juice with one cup of cold vodka, a very cold bottle of Prosecco and one cup of the cooled strawberry/mint simple syrup.
Strawberry-15

Strawberry-16

Strawberry-21
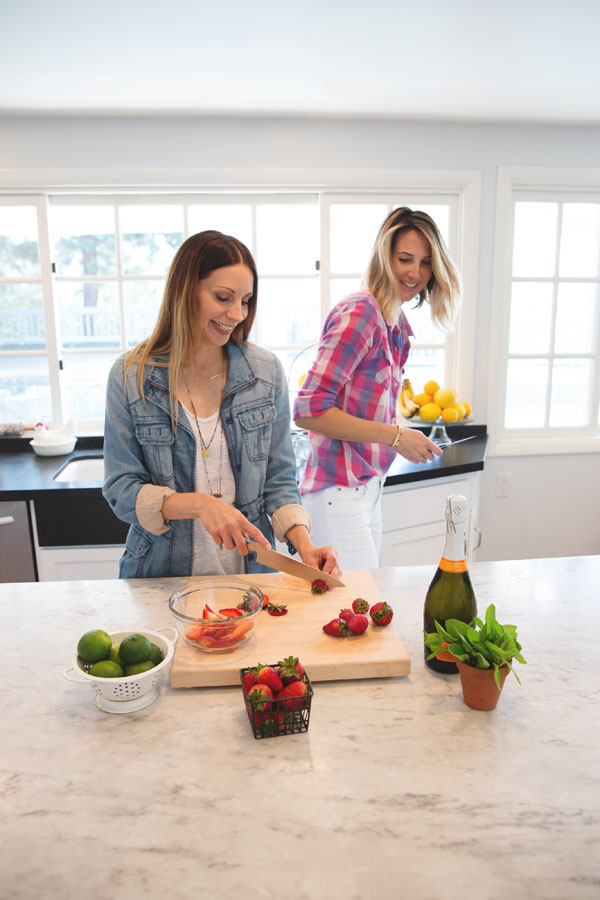
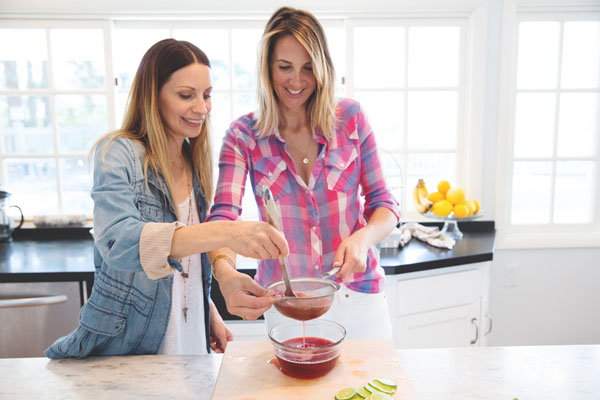
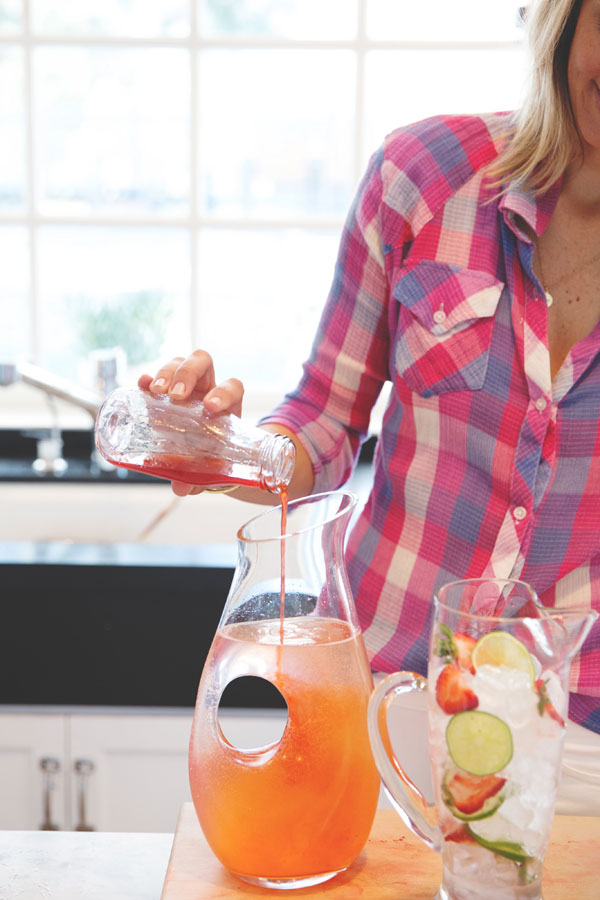
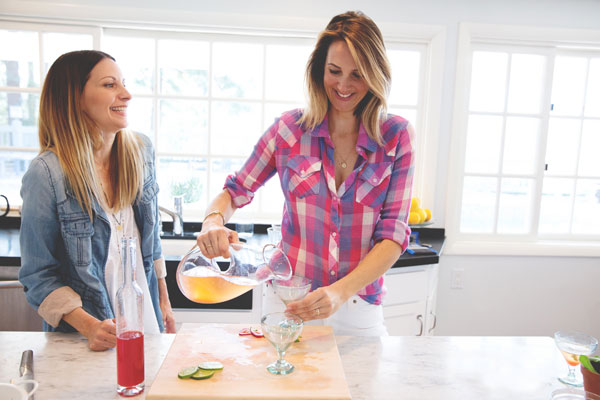
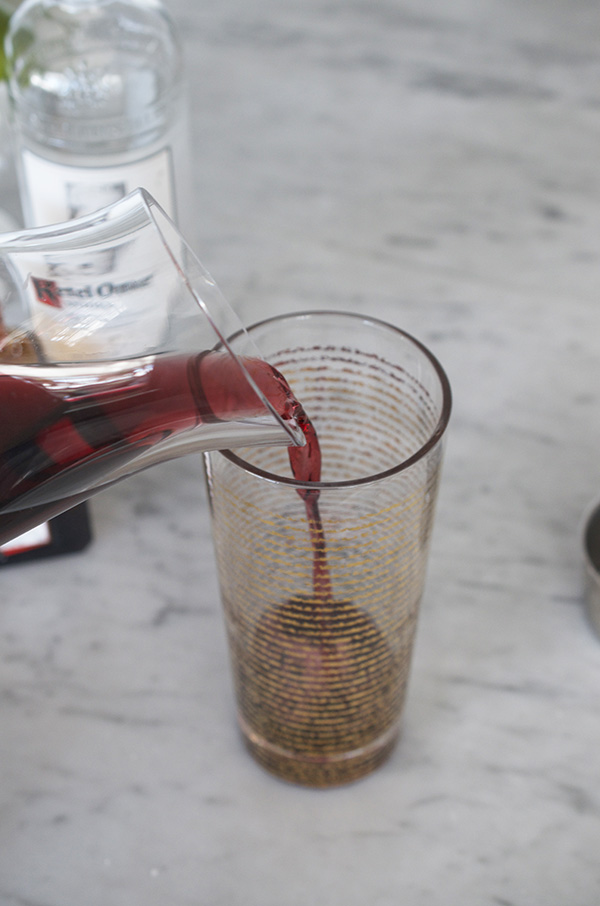
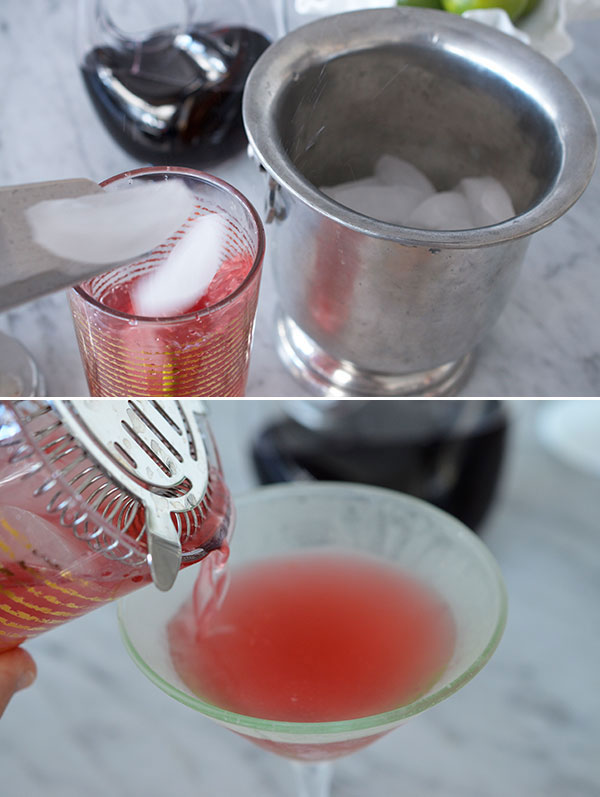
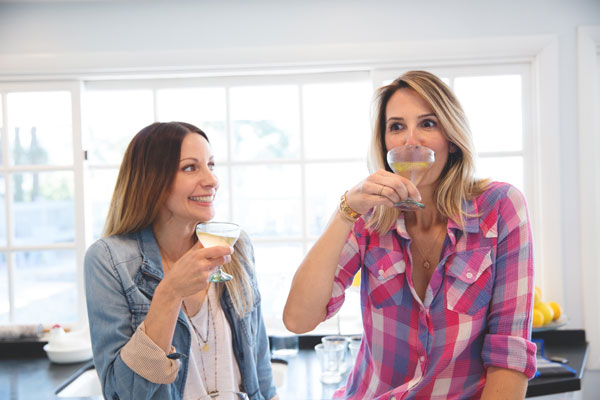
Then pour, toast, laugh with your peeps.

Strawberry-19

Keep on ice nearby for guests to serve themselves, and you, on repeat. Garnish with lime slices, mint leaves, strawberry slices or all three!

For full recipe details, and SOOOOOO much more deliciousness visit Lieslicious today! And to make your life look REALLY beautiful visit Ashley Forchelli Photography.

Thanks so much girls, and when can we do it again!!!!!

XO

Filed Under: Home, Made

how to make pumpkin seeds

October 29, 2014 |

Seeds-finished

Sometimes I worry I’m not instilling enough tradition into our family life. Yes, I am completely neurotic and over think pretty much everything. Especially when it comes to my family. We are of the laid-back Southern California family breed so we tend to go with the flow, take things as they come and not make a lot of plans. This doesn’t always work in favor of tradition, which in essence means doing the same thing again and again. What dawned on me the other day while carving pumpkins with the girls is that a tradition doesn’t necessarily have to be an event or a routine, a place or a whole trip. It can be as simple as food. Whenever my mom carved pumpkins she always did a few of the same things-carved detailed eyes and girly eyelashes on at least one of the pumpkins, used hairspray to remove the marker we drew on the pumpkin to guide our design and finally she always always always roasted pumpkin seeds. And so a tradition was born, simple as seeds. I didn’t even realize I had carried that tradition on until Elle started obsessing about keeping the seeds from her carving the other day. Oh yeah, that’s right-we roast them too. And we also use hairspray to remove Sharpie from a pumpkin of course. So what am I stressing about? There is tradition all around me. Here’s a few simple steps if you’d like to add one of ours to yours. Happy Halloween-xo

Girls-and-their-pumpkins

Step one-carve a pumpkin

Seeds-in-colander

Step two-separate the pulp from the seeds, clean seeds in a colander and pour onto a cookie sheet. Do not pat the seeds dry, otherwise they will stick together.

Seeds-in-oven

Step three-roast them in the oven at 300 degrees for 30 minutes to dry them out.

Oil-on-seeds

Step four-coat seeds lightly in olive oil

Girls-mixing

Step five-find some little ones who like getting their hands dirty and have them salt the seeds and mix them around until they are coated evenly in oil and salt. Then return them to the oven until golden and crisp, about 20 more minutes. I used flavored salts from my friends at Laguna Salt for a gourmet touch. For sweet seeds try a little sugar and cinnamon.

Laguna-salt

Coco-posing

Step six-while you’re waiting for the seeds to crisp, pose adorably in front of your newly carved Frankenstein pumpkins.

Seeds-closeup

Step seven-Enjoy! Serve warm or bag them up for snacks.

Finished-pumpkins

Filed Under: Home, Made

childrens’ Valentine’s Day cards

February 12, 2014 |

C&B-Valentine-2014

Happy (almost) Valentine’s Day from Coco and Elle!!!

This year I’m giving a special Valentine’s Day shout out to all the ladies in my life-girlfriends, MFFs (mom friends forever), sisters-in-law, mothers-in-law, mentors, future golden girls, godmothers and of course my mom. The power of women gathering, sharing, laughing, crying is one of the most important forces in my life and I couldn’t let this week of love go by without giving it proper acknowledgement. I’ve always had strong relationships with women, whether they be childhood friends or special co-workers. Each one has shaped me in some way and brought me to the place I stand today, and I’m loving the view. The icing on this cake is that I’ve been given the opportunity to share this phenomenon with my two girls. The other day Elle was talking about a team at school. Since she’s not in sports I was confused. She was listing names of her friends and when I asked what team she was talking about she said, “You know like you have your team.” Then she listed half a dozen of my best girlfriends’ names. I just about fell off my chair and had to keep my heart from bursting out of my chest. So many lessons I teach the girls have to be hammered into their head over and over again until the sound of my voice makes me cringe. But the lesson of friendship and sisterhood they got from example, seen in the play dates with MFFs, pool days with longtime friends and girls’ trips with my mom and godmother. Besides getting Elle to stop sucking her thumb I think this might be my crowning achievement as a parent. I might have peaked here. But that’s ok. If the girls get support like I get from the women in their life, especially their girlfriends, they’ll have plenty of ears to bend about all the other ways I’ll screw them up-ha! Happy Valentine’s Day everyone, hope you’re feeling the love!

Like my children’s’ Valentine Day cards this year? You can download them here . I printed mine out on card stock and punched a hole in the corner. Attach to a goodie bag with cute V-day ribbon and you’re good to go.

Filed Under: Home, Made, The girls Tagged With: children, childrens valentines day cards, friendship, girls, lessons, women

pomegranate martinis

December 9, 2013 |

Pomegranate-Martinis

We kicked the holiday season off this weekend with a pre-party where I served these pomegranate martinis and they were such a hit I had to share. This was the first specialty cocktail I’ve ever made, and it was so easy and fun I think this might be the first of many. Only part I thought would be tricky was making the simple syrup, which is just sugar dissolved in equal parts water (see tips below). It was so easy I ended up making extra to keep for future spirit endeavors. Bit of advice, the recipe serves four, so I doubled it for my dozen guests and still had to make a second batch. Don’t worry, we Ubered. Cheers!

Goods

What you’ll need.

Before you start, chill your martini glasses in the freezer.

(Love my martini shaker Jamers)

Limes

Don’t skimp on the fresh lime juice, it makes all the difference.

Pour

Pour all ingredients into a pitcher or martini shaker.

Ice-pour

Ice it up, shake extra hard for ice chips.

Cut limes

Cheers


How-to-make-simple-syrup

Filed Under: Made

How to revive dry Play-Doh

August 14, 2013 |

Doh-Over
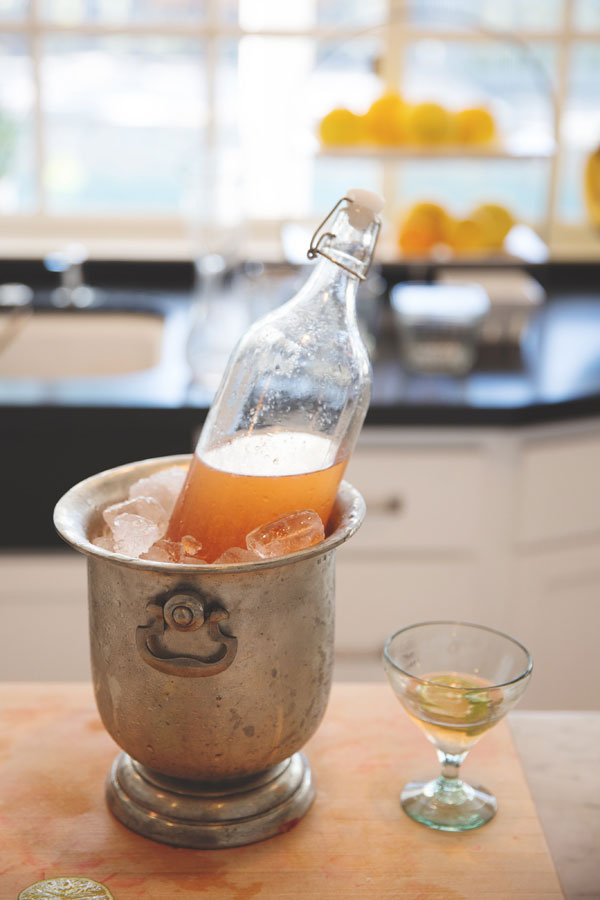
I have a love-hate affair with Play-Doh. On one hand it is a guaranteed hour of free time as it entertains my girls. Coco especially is insane for it right now, but Elle can definitely roll with the doh as well. On the other hand, I can’t stand the mess and, until learning this trick, the waist. If you don’t seal the stuff it can dry in minutes, and when we’re rushing out the door the proper pickup doesn’t always happen.  After a few days in my house new Play-Doh turns into plastic bags filled with a crumbly mess. I found this trick online and after trying it myself, I had to share. The result is good-as-new Play-Doh, sometimes better than new since it has the opportunity for new colors. If your kids go through this stuff as fast as mine do try this before going out to buy new.

_DSC3149

Sort the crumbly mess into color piles on a clean dry surface.

_DSC3151

Run it under warm water and knead the dough until it begins to stick together again and regain its elasticity. Repeat.

dough-close-up

Once it starts sticking together you don’t need anymore water. Continue kneading until it becomes a recognizable Play-doh texture. PS-this can be a great arm workout, I’m sad to say I was a bit sore the next day.
Triple

Roll, shape, create!

Cokes

Other Play-doh tips

*Keep Ziploc bags around, if you don’t have time to put it all back in appropriate cans, throw it in a bag, squeeze the air out and seal

*Try the Play-doh Grab N Go at your next dinner out. It worked better than crayons for us the other night, and was easy clean-up


Filed Under: Made

Displaying children’s art

June 23, 2013 |

Full-wall

It seems like forever now I’ve been trying to find a way to display the girls artwork properly. Art is really all they want to do these days and of course I want to encourage it. That and I’m sick of these things laying all over the house taped to walls, mirrors and anything else that will stand still long enough. I finally found this great system the other day strolling through the IKEA showroom. God I love/hate that place! These were pretty simple to install, but know they do not include hanging hardware, meaning the screws you need. So I suggest taking them to your local hardware store and knowing what kind of wall you’re putting them in, drywall, stud, etc. before you go. Tools I used (and yes, I did this myself) that were game changers were a drill, level, pencil and measuring tape. These all helped me save time and make sure the lines were straight and evenly spaced. As you can see the girls are loving their new “gallery wall” and I’m loving all the bright colors in their new playroom and seeing how proud they are to display their work. This took a little time to do, but it was so worth it. For the end result and also the therapeutic feeling that comes from starting and completing a project and having it come out as well as, or in this case, better than you imagined it would. Don’t you agree? What are some of your favorite labors of love?

2

1

Final

3

Girls


Filed Under: Made

valentine’s day cards

February 13, 2013 |

Coco's-cards

I’ve never liked Valentine’s Day. In fact I’ve hated it for most of my life (pre-hubs of course). Hate’s a strong word, severely disliked it. It’s always too much expectation, inevitable disappointment and a general feeling of uneasiness-guess that’s what forced affection does to me. I know I’m not alone. But like so many things, once I had kids that all changed. Now it’s all about the colors, the candy, the crafts and the general feeling I can only describe as gush. Yes, I just made up a feeling. Yesterday the girls put their Valentines together and even though it was sprinkled with tantrums, for the most part it was a very enjoyable half hour. Monday night, at midnight of course, I was inspired to make these Valentine’s Day cards and it’s kind of scary how excited I am about the way they turned out. The rest of the goodies all came from Michaels, and they’re still there-I just went yesterday to get them. The only thing that might be tricky were the bubbles, which I found in the wedding section of the store, not the Valentines display, which was slim pickings by the time I got there. I broke my cardinal rule of never gifting bubbles (such a mess) because I thought a bunch of messy 2-year-olds was better than a bunch of sugar high 2-year-olds. For Elle’s more sophisticated Kindergarten group, we went with classic Hershey’s kisses in festive colors. The assembly was easy and as you can see below the reward was massive. If you like the girls’ cards, make them your own with this download. Print them out on some card stock, cut them into squares and share the love.

Cutting-and-punching
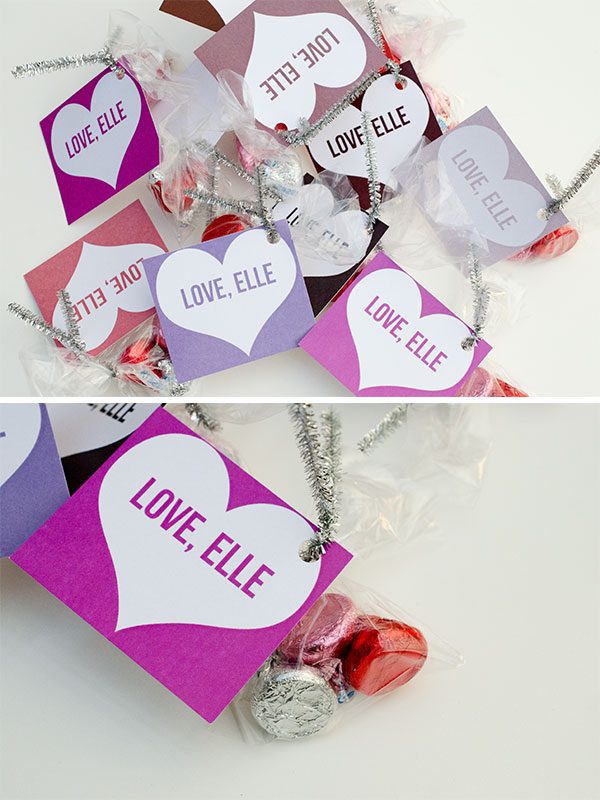
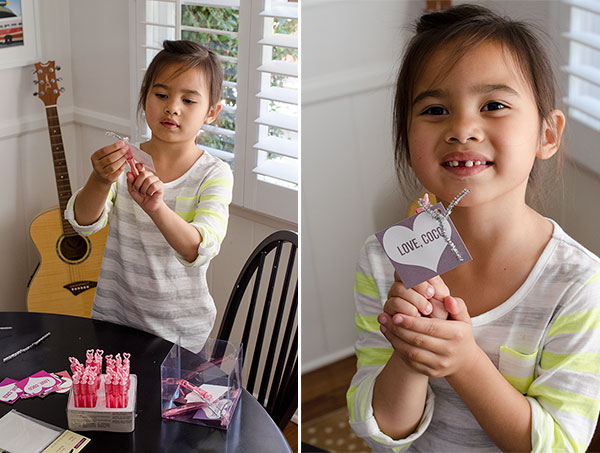
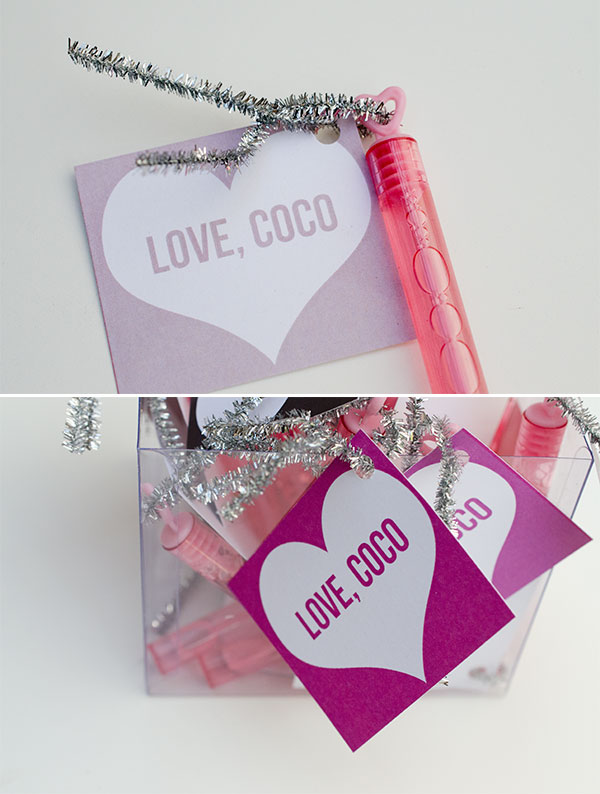
Silver pipe cleaners to fasten the tags, which we punched a hole through using one of these.

Bubbles

As bubbles go, these are not insanely messy. Sorry moms they were too cute, had to do it.

Elle-putting-on-finishing-touches

Elle (aka Snaggletooth) hard at work.

Coco-testing-the-merchandise

Coco testing the merchandise.

Coco's-up-close

Big-sister,-little-sister
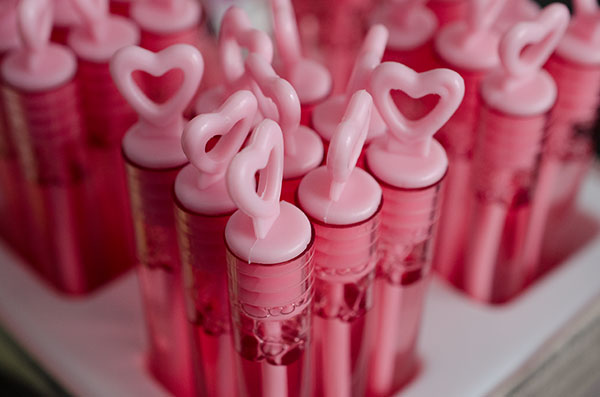
This was the best part of my day. Brief, but beautiful.

Elle's-up-close

Filed Under: Made, The girls Tagged With: free download, personalized Valentine's Day cards

do it yourself gift tags

December 21, 2012 |

Remember that DIY urge I felt coming on the other day? Well here’s the result, my spin on the do it yourself gift tag. This was super easy to do and fun. Elle and her BooBoo (grandma) made it a playdate activity and I could not be happier with all their hard work. I chose these rustic brown bag type gift tags and stuck with basic black ink. I initially thought of doing red or green ink but wasn’t sure how it would look on the brown. White tags would probably be better for that. When I was shopping for the ink I learned they come in slow-dry and fast-dry. Even though I chose a fast-drying ink, it can get a little messy if it doesn’t dry all the way. Try to allow a few minutes of dry time and lay them out flat instead of stacked on top of each other to avoid smudging. Light a fire, brew some hot cocoa and have fun. Happy stamping!

Thoroughly wet stamp in ink pad and place stamp on far side of the tag to leave room for a greeting.

Thread the ribbon through the hole and grab a pen.

Fill in the blank.

Place it on a gift under the tree and pass out the love. Merry, merry!

All products purchased at Michael’s.

Filed Under: Made

holiday cards keepsake

December 5, 2012 |

Our first kiddo card.

It’s kind of ridiculous how much joy holiday cards bring to my heart. I love pretty much everything about them-making them, receiving them and displaying them. For years, I’ve been trying to put together a book of all the cards we’ve put out since our first in 2005 of our wedding. Considering how easy this was to do, I don’t know why it took so long. The hardest part was tracking them all down. Shot out to Auntie Kathy and Michelle Warren for providing the missing pieces to this puzzle and donating your copies. I used this Kolo Newbury album, my favorite, and chose holiday red, also my favorite. Another key piece is Kolo’s clear adhesive photo corners. (See video below) Someday my kids won’t be as willing to be in these family photos, and I probably won’t be as willing to get in front of the camera with them, so I’m glad I’ve got these put away for safe keeping. The album has 20 pages and right now I can’t imagine filling them all. How could my sweet babes ever be twenty-years-old!?! I put this together last night and I’ve already gone through it about twenty times. ‘Cause really what’s better than watching your family grow right before your eyes? Not much in my book, pun very much intended.

PS-no, I’m not peeking on eggnog, just having a good day. Hope you are too.

Every year I’ll change the cover to show that year’s card. Spoiler alert!

The clear corners disappear and allow you to take the card out to see the inside then put it back in place.

I love Kolo’s details. So simple and clean.

Filed Under: Made

Next Page »
  • Facebook
  • Instagram
  • Pinterest
  • Twitter

Recent Pins

Instagrammin’

Archives

Subscribe

Copyright © 2025 Coconut & Bean | Web Design by Viva la Violette.

Copyright © 2025 · Runway Pro on Genesis Framework · WordPress · Log in